
 Українська
 Русский
Step by step Guide to work with BeMob tracker
BeMob is a performance marketing tracking software for media buyers, affiliate and performance marketers.
This cloud-based platform is a reliable product with a complete set of advanced tools to analyze and optimize your advertising campaigns in the most efficient way.
As Everad is already available in the BeMob templates, the postback configurations become easier.
BeMob Settings
Press Affiliate Networks tab.
Click New from the template and choose Everad from the list.
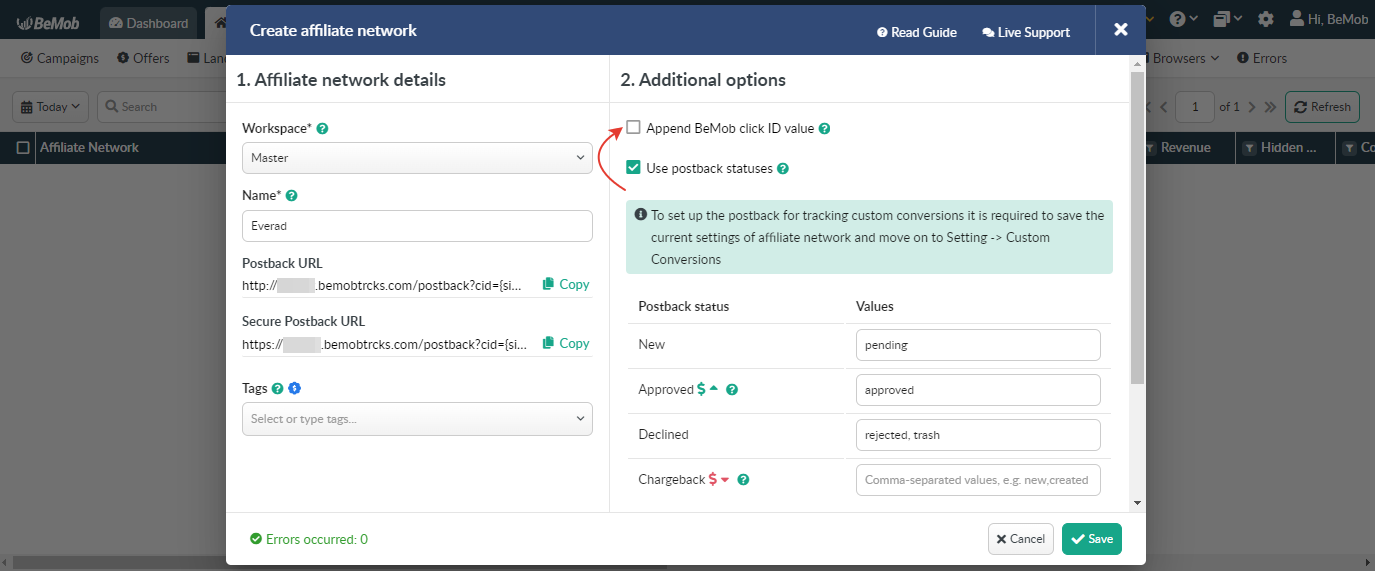
The settings window is separated into 2 parts: Affiliate Network Details and Additional Options.
Affiliate Network Details
This part contains the following settings:
- workspace selection
Workspaces of BeMob help to separate all the working processes into areas. Along with the Users Management, this option allows to organize and manage the campaigns and elements smartly.
By default, all the elements you create go to Master WS. Leave the default selection if you have no other pre-configured custom workspaces and move on to other settings.
🔎 Learn more about this option in our Workspaces guide.
- postback settings
Since we have already set the Everad postback URL on our side, all you need to do is to click on Copy button.
The preconfigured postback URL of Everad on the side of BeMob is:
http://yourdomain.com/postback?cid={sid1}&payout={payout}&txid=OPTIONAL&status={status}
‘&txid=OPTIONAL‘ should be removed from the postback, when placing the URL on the side of Everad.
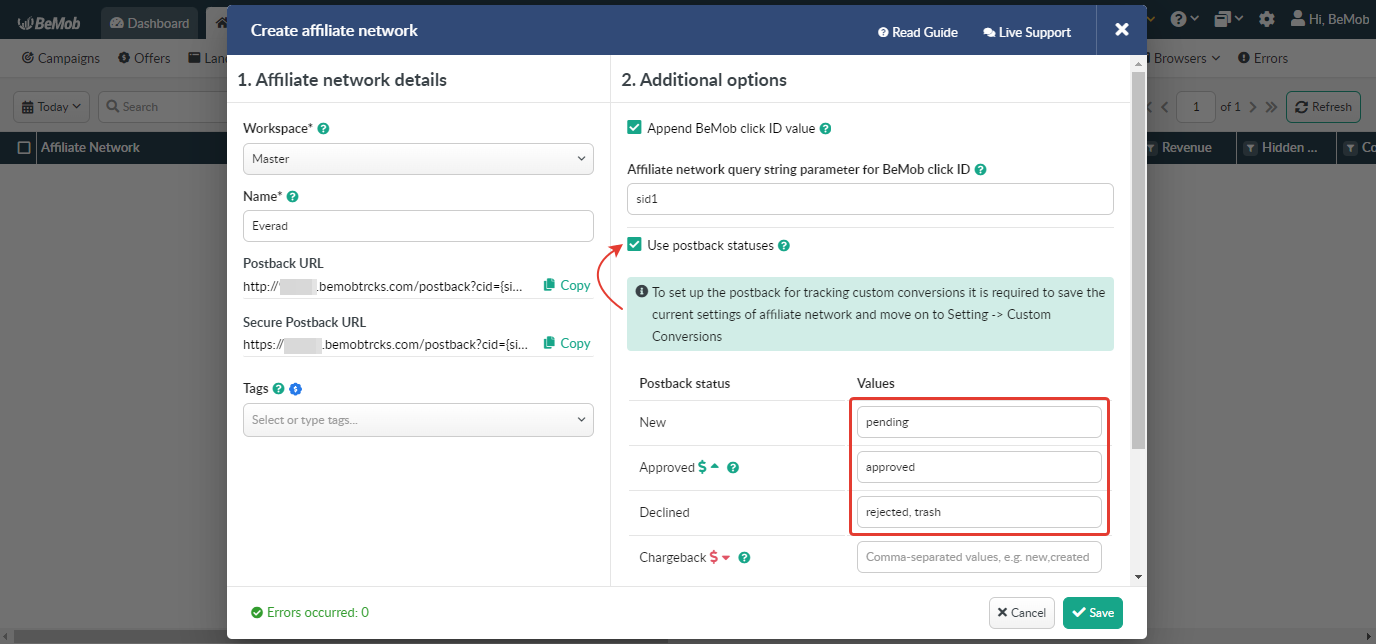
Additional Options
Use Postback Statuses option allows you to receive data on conversions with different statuses. You can track each stage of conversion from the moment it appears till the conversion is paid or rejected.
Everad is forwarding the status of each conversion via postback request.
Status values are pre-configured in the Everad template.
If you tick the option Use Postback Statuses BeMob will recognize the statuses of conversions that are delivered via postback request from Everad.
To see the status data it is required to switch on the corresponding columns in the Columns Settings.
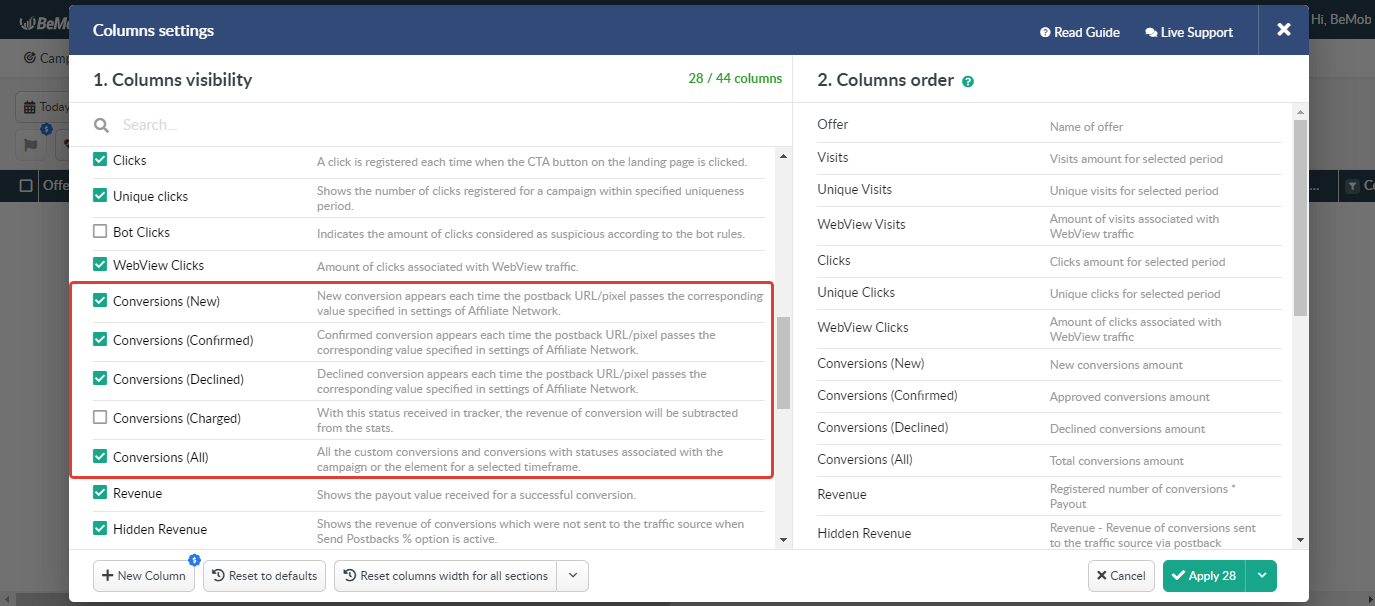
🔎 More about these settings learn in our dedicated Columns Settings guide
Other options such as accepting double postbacks and IPs whitelisting are completely optional in terms of Everad settings.
❓ Relevant guide on additional options – Double Postbacks and Postbacks From White IPs
Click on the Save button to store the settings of Everad and log into Everad account.
Everad Settings
After Everad is added with BeMob, it is required to add the postback URL on the side of this affiliate network which will notify BeMob about each incoming conversion.
If you place the postback URL as http://yourdomain.com/postback?cid=REPLACE&payout=OPTIONAL&txid=OPTIONAL&status=OPTIONAL the conversions data will not be tracked with BeMob.
Postback URL should contain Everad dedicated tokens, that’s why it is recommended to copy the postback URL from BeMob and place it on the side of Everad with all pre-populated tokens.
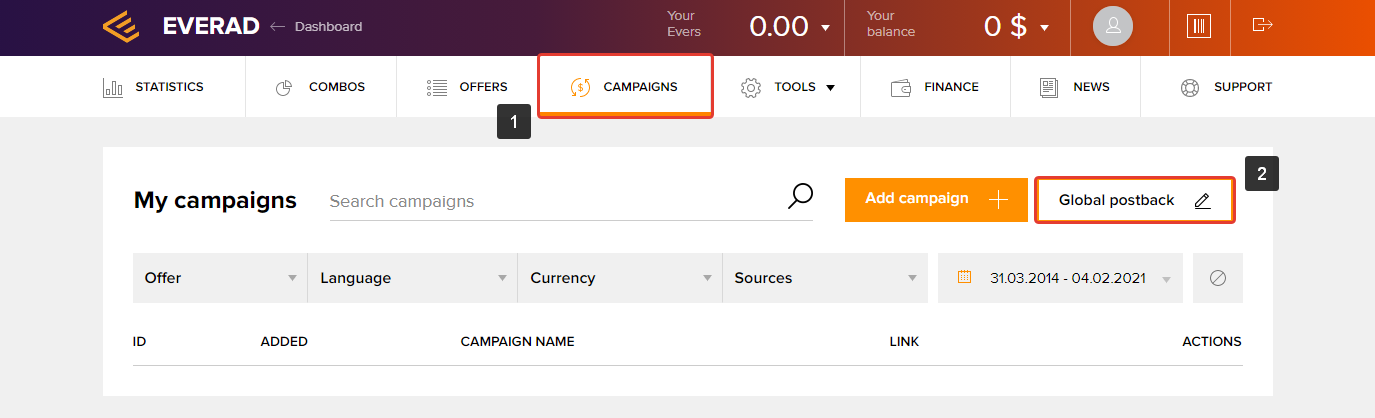
To place the postback URL on the side Everad follow these steps:
- Go to Campaigns on the panel.
- Press Global postback button.
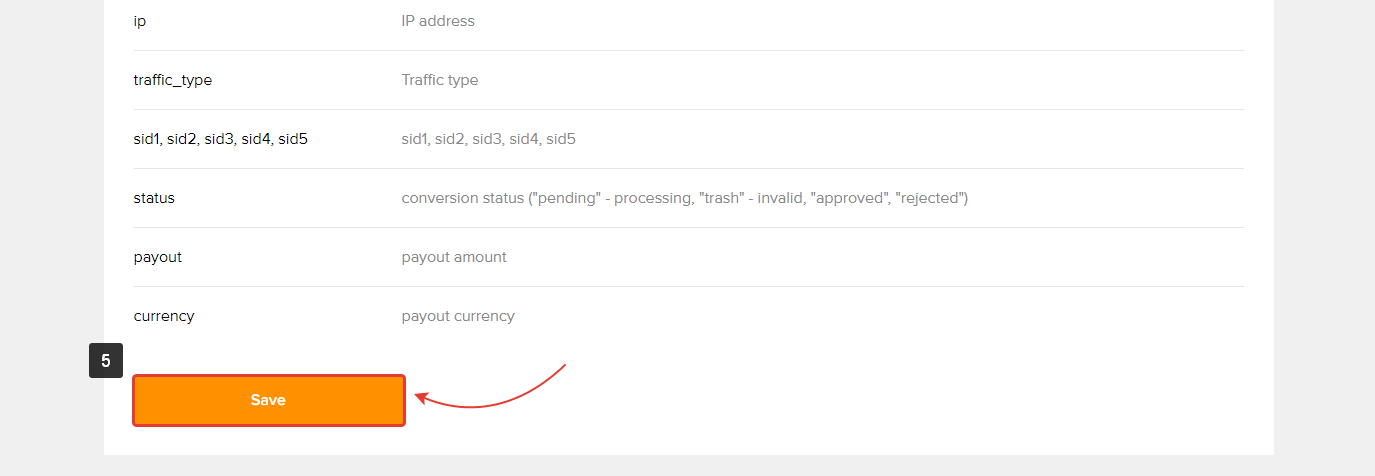
- Paste Postback URL in the corresponding field.
- Tick Postback on conversion status change option to track data of all conversion statuses.
This is how your postback setting should look on the side of Everad.

- Press Save to store the settings.
After the postback URL is added on the side of Everad it is required to copy the offer URL and go back to your BeMob settings.
Offer Settings
To get offer link on the side of Everad:
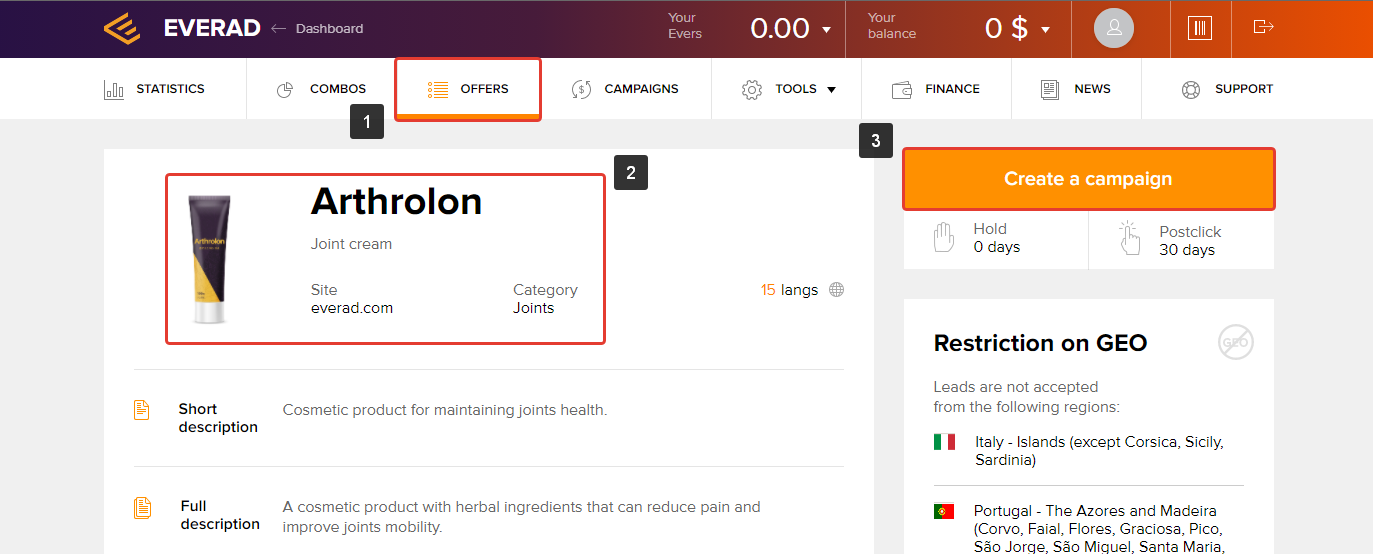
- Go to Offers on Evarad panel.
- Select the required offer from the list.
- Press Create a campaign button.
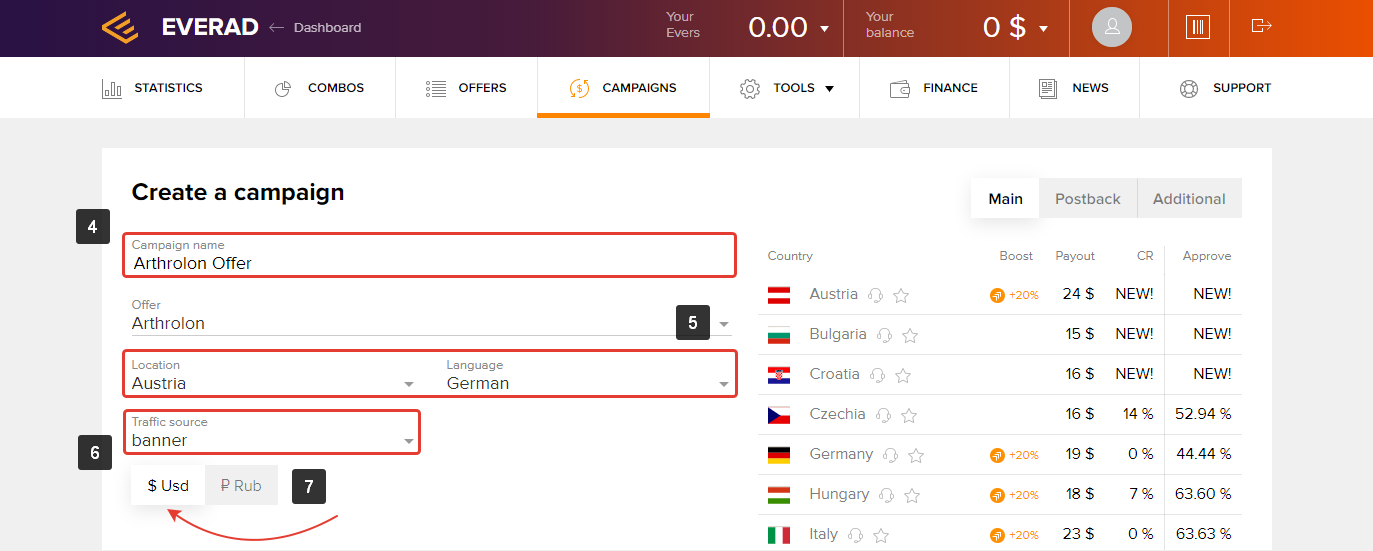
- Specify the Name of the campaign.
- Select Location and Language.
- Choose the Traffic source you are going to use. Since you’re working via tracker you can select any source here.
- Select the required Currency. This selection affects the currency you will receive the payout in.
- Select the landing page and prelanding page.

![]()
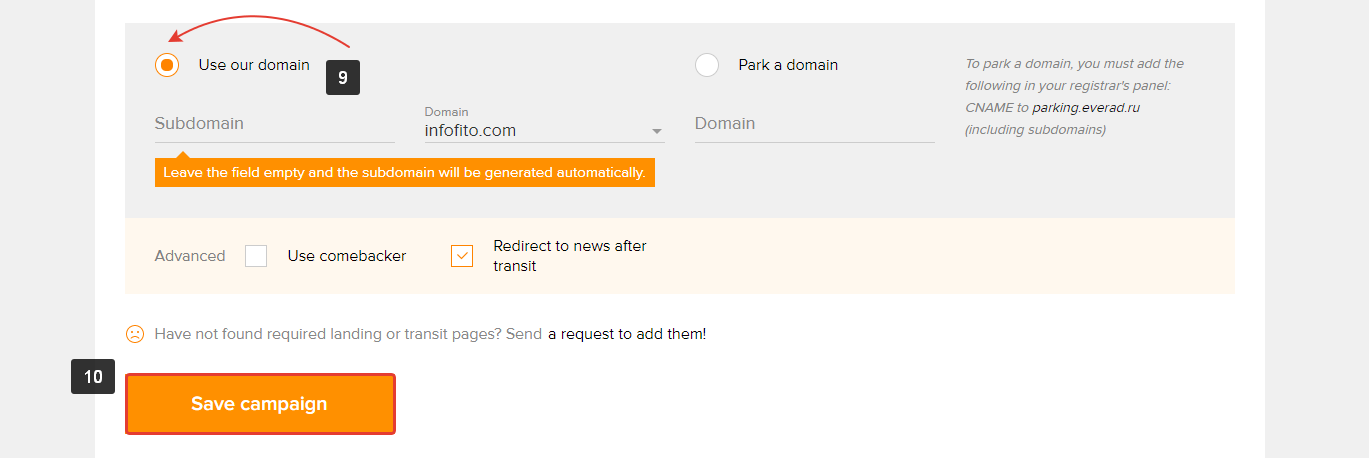
- Use the domain provided by Everad or add your own domain.
- Press Save campaign button to store the settings.
Copy the offer link
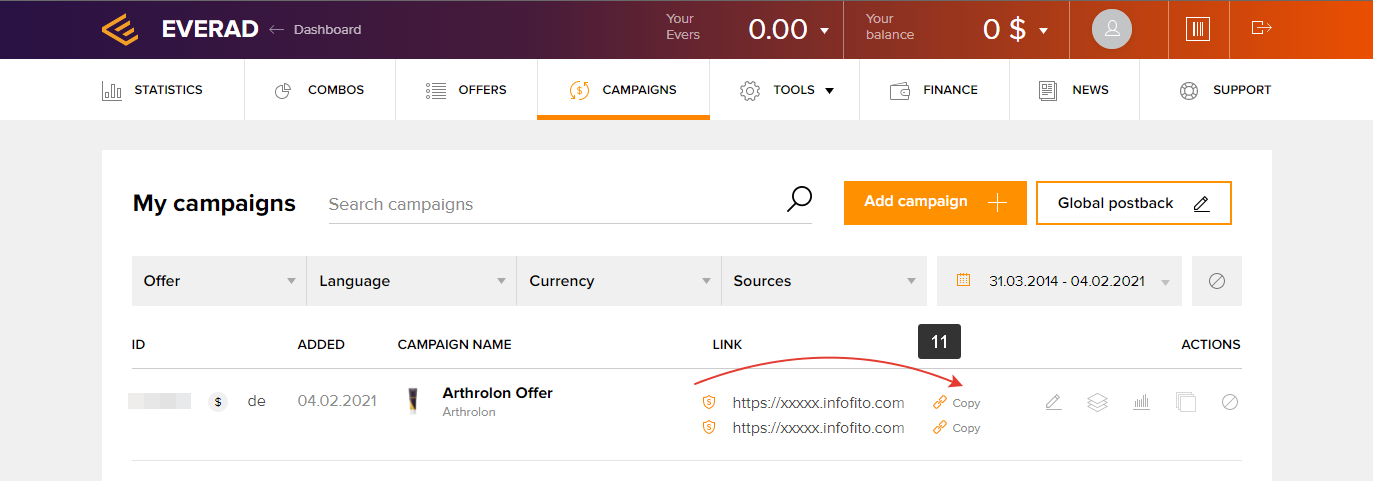
To add the Everad offer URL in BeMob it is required:
- Press Offers tab.
- Click New.

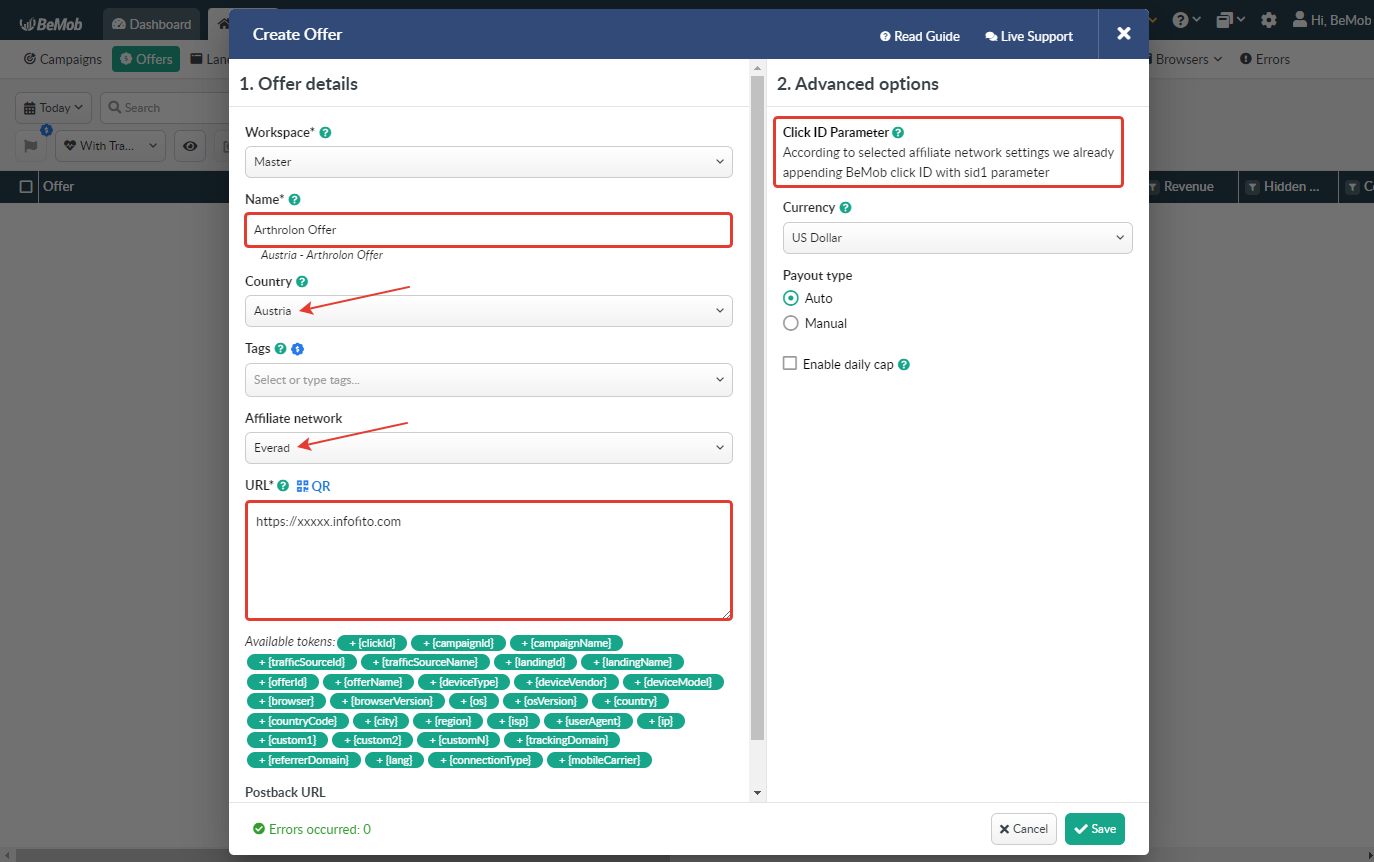
After the offer settings window appear it is required to:
- add the offer name;
- specify the geo of offer;
- select Everad as Affiliate Network;
- place the offer in the URL section;
- select the currency – it should match your currency choice on the side of Everad;
- press Save to store the settings.
🔎 For more details on the offer settings see our dedicated guide.
Click ID Setting
Setting up BeMob Click ID is the obligatory step for the correct conversions tracking process. The dedicated token and parameter should be added either at the end of the offer URL or specified in the affiliate network settings of BeMob.
In the example above you can see that no click ID value is added at the end of the offer URL as the click ID has been specified in the Everad template at the stage of affiliate network settings.
To pass click ID manually the sid1={clickId} part should be added at the end of each offer URL from Everad and the automatic click ID passing should be switched off in the Everad template.
Here is the sample of Everad template and offer settings, when you decide to pass the click ID manually.
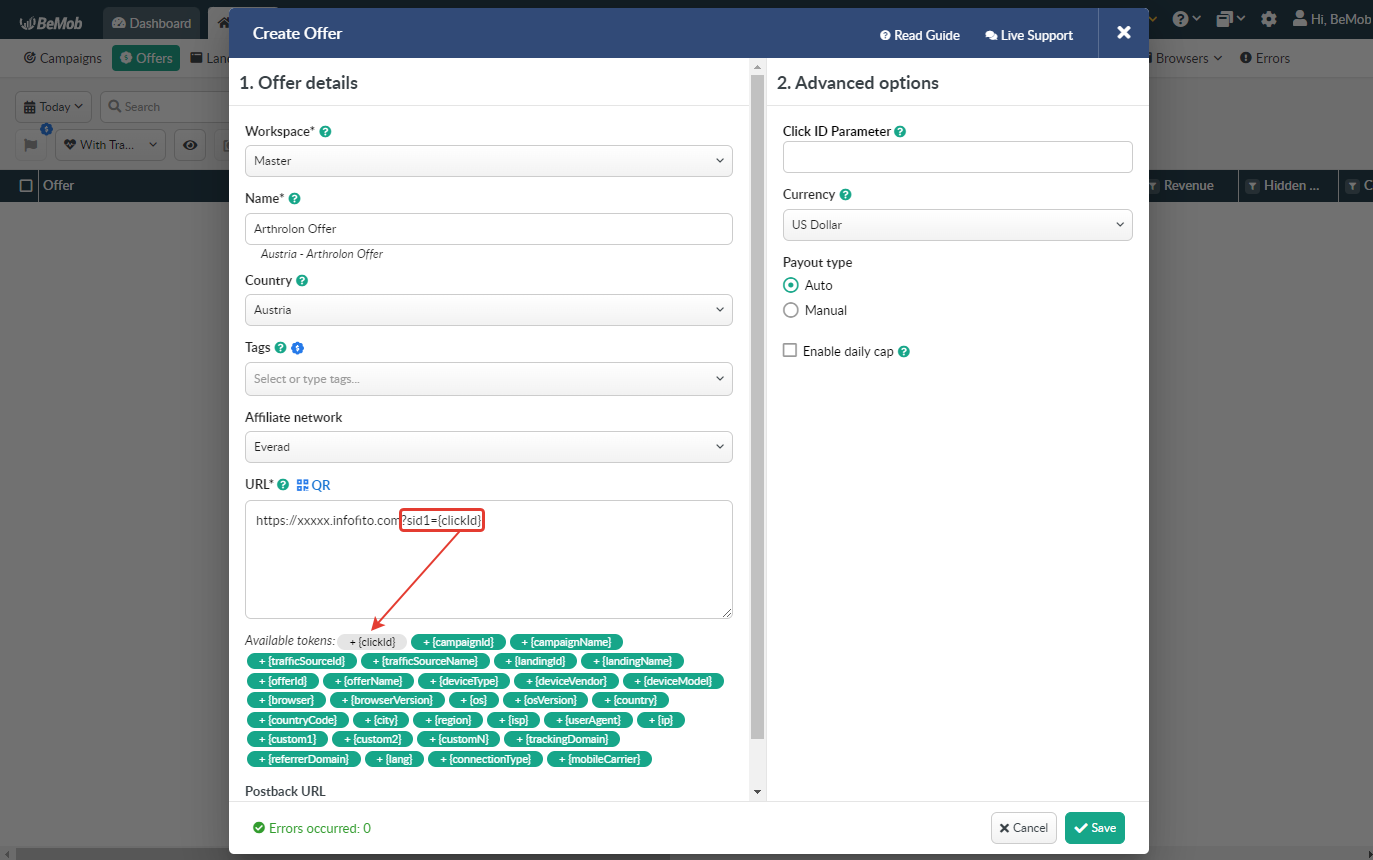
It is required to select either appending BeMob click ID automatically or manually in offer settings.
After Everad offer is set up, it is required to move on to traffic source and campaign settings in BeMob.
If you have any questions or need assistance with the settings, contact our support team through the live chat or at [email protected]
Reviews