
 Українська
 Русский
Step by step Guide to work with Keitaro 10
We continue to share detailed instructions on setting up various services to work with Everad. Today we will look at Keitaro, a tracker for affiliate marketing and CPA marketing.
Keitaro is one of the best and most flexible trackers with a wide range of tools for comfortable work. The new, tenth version, has received even more cool features that will undoubtedly help you get the maximum profit when working with Everad offers.
The main advantages of the service:
- huge functionality, including the ability to add custom scripts, filters and macros
- unlimited possibilities of integration with external traffic sources
- the ability to locally configure and work without a redirect
- clear and user-friendly interface
- detailed reporting and data privacy
- friendly and responsive technical support that works online and is ready to help at any time
- 14-day trial with no restrictions on functionality
Setting up Keitaro
You can learn how to install the Keitaro tracker here or contact Keitaro technical support.
Today we will look at the following options for setting up Everad offers in the tracker:
- Redirect to offer
- Local landing (with and without a transit page)
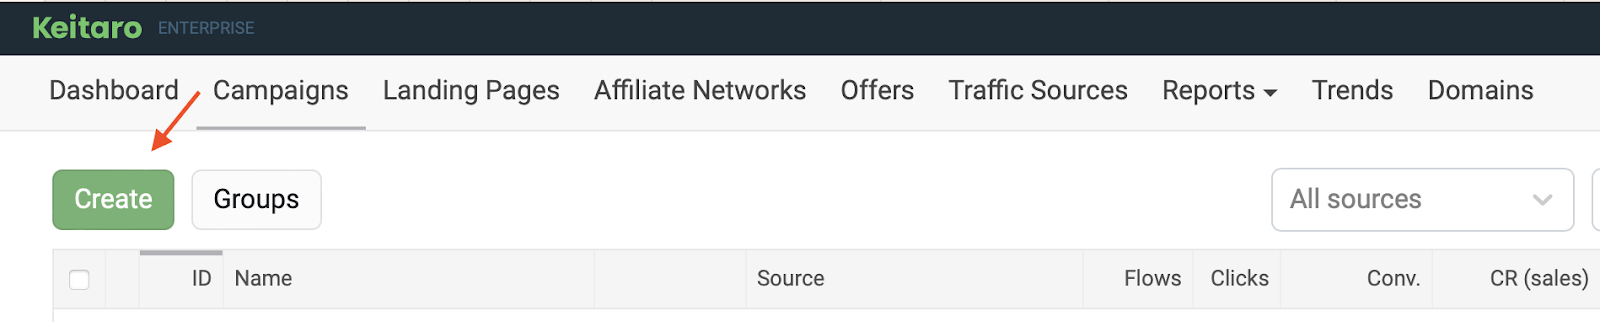
Regardless of the scheme choice, first of all, we need to create an affiliate network template. Go to the Affiliate Networks tab and click the Create button:
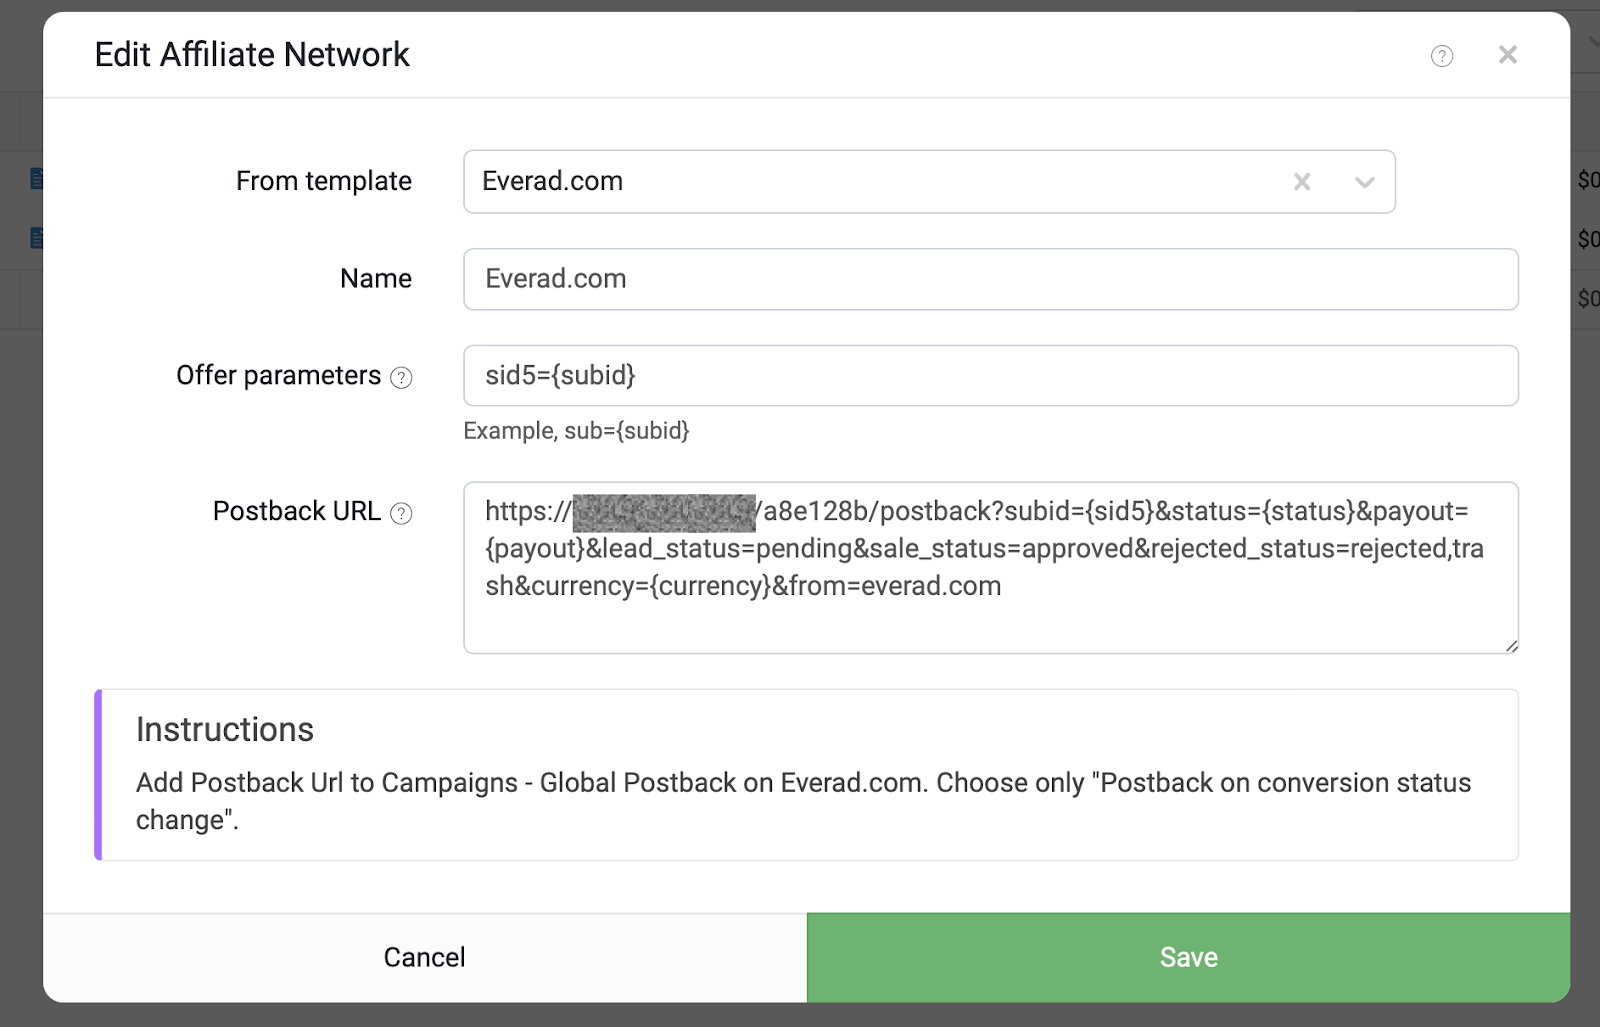
Select Everad from the drop-down list and click Create.
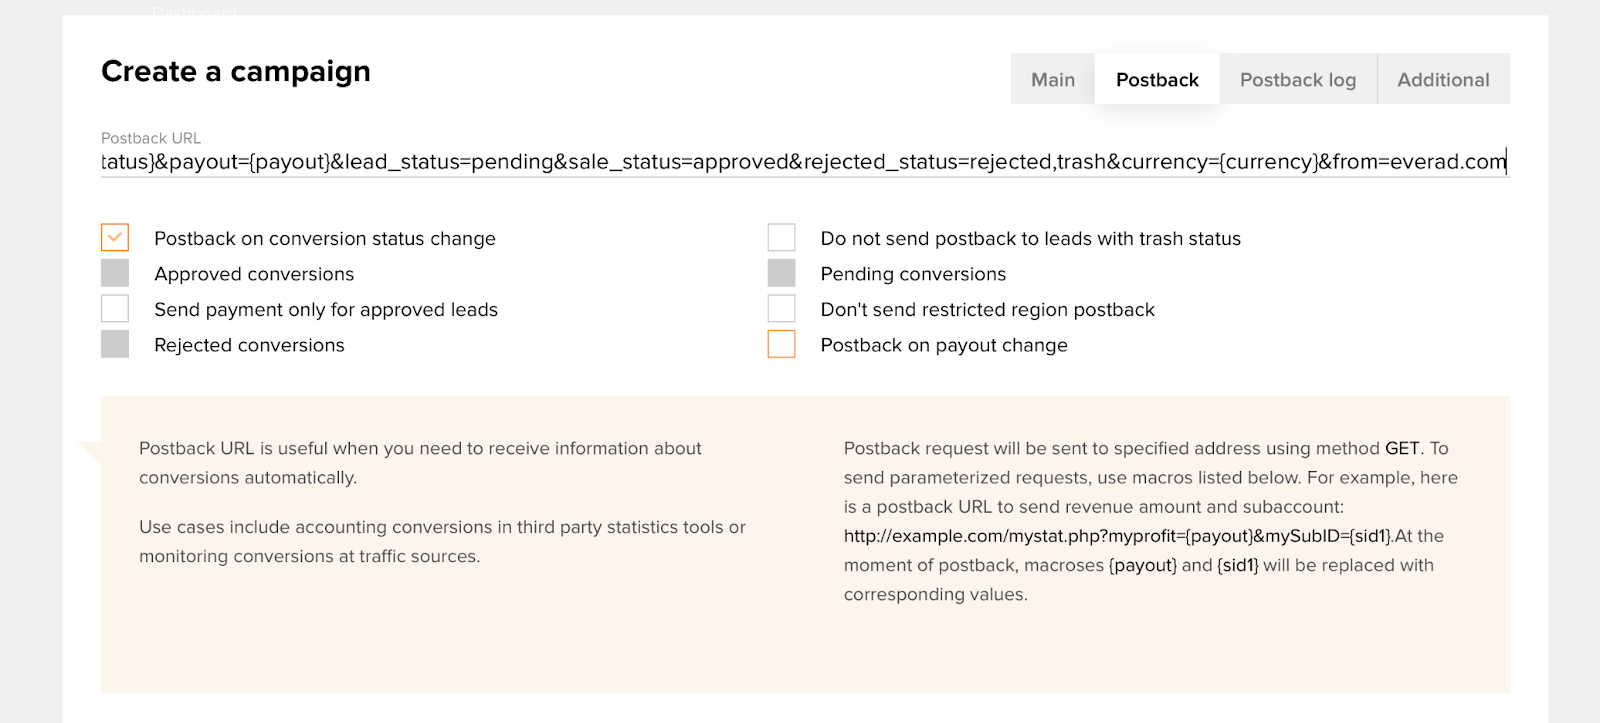
Now be sure to paste the Postback URL link from the Keitaro template into the Global Postback or stream in your Everad account:
Now let’s create our tracker campaign.
Go to the Campaigns tab and click Create:
The page for creating a campaign will open, enter the name of the campaign and click Create.
Now consider the work with each individual scheme.
Redirect to offer
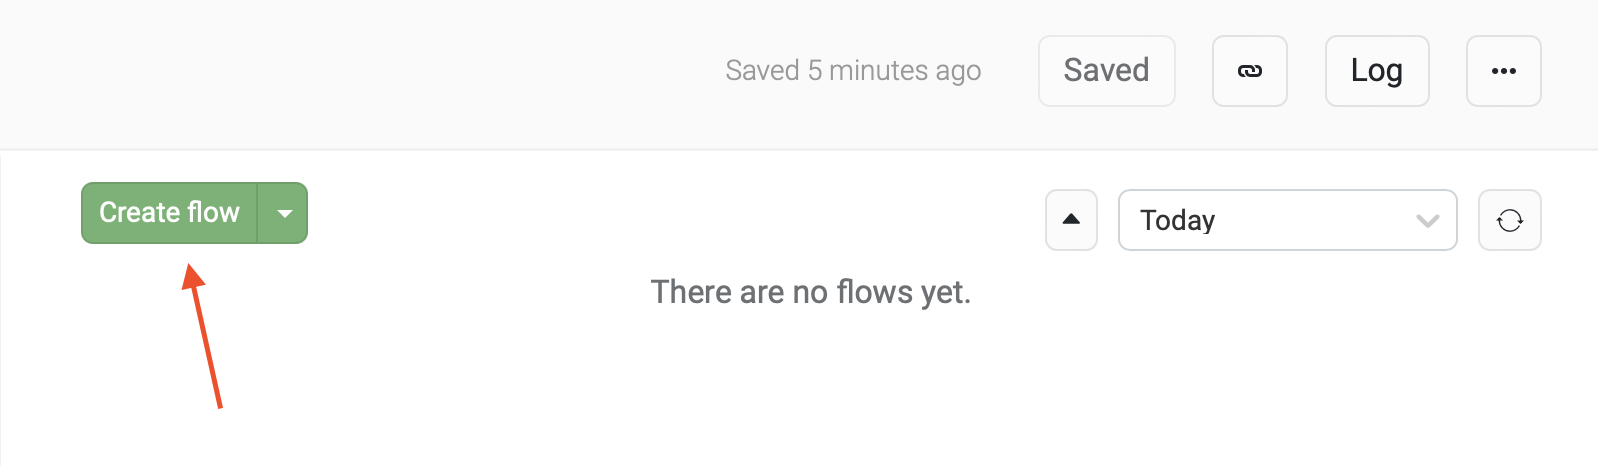
In the created campaign, you need to click Create flow:
Following tab Schema – Landing pages & offers – Offers – Create Offer:
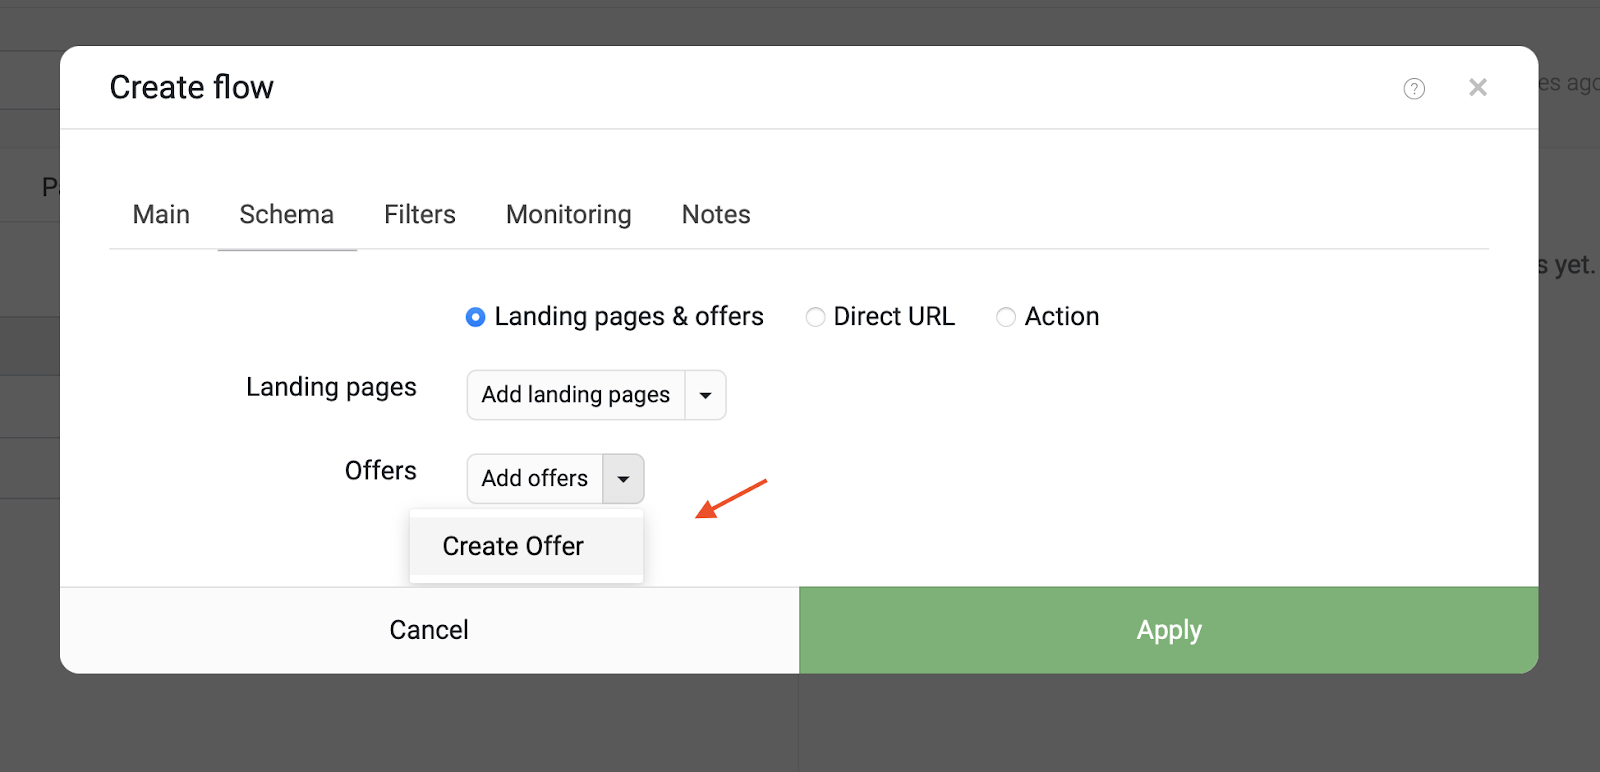
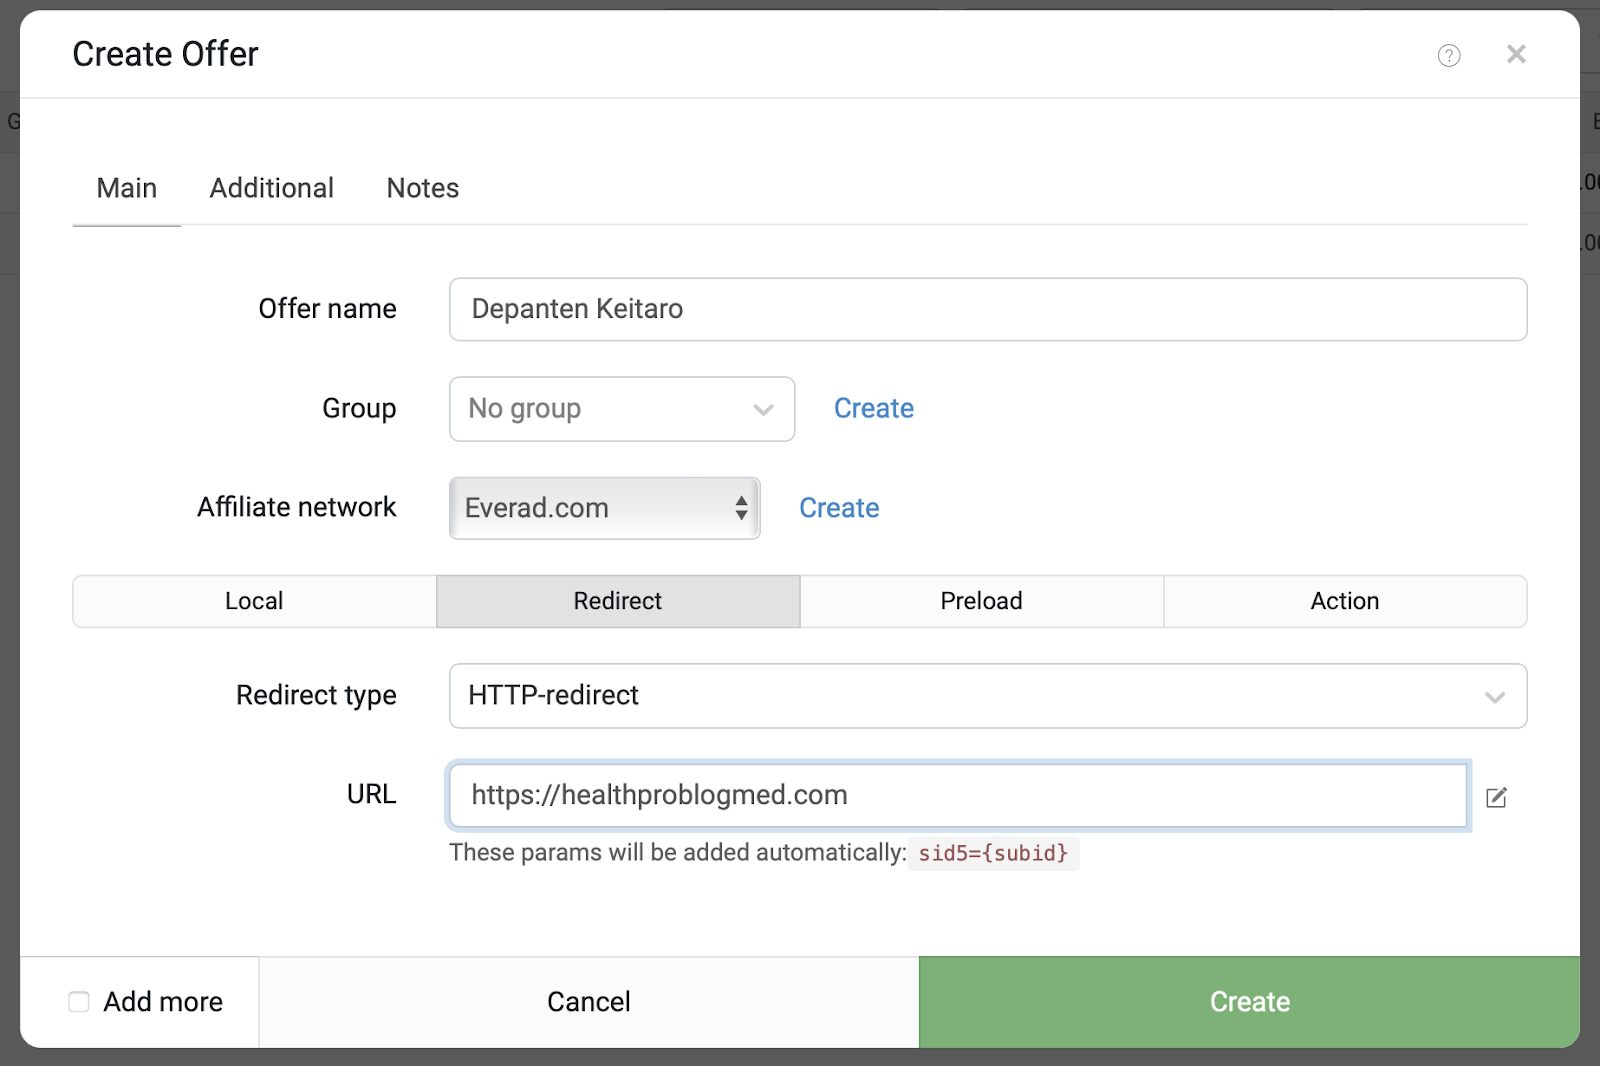
In the window that opens, fill in the following fields:
- Offer name – the name of our offer;
- Affiliate network – selection of an affiliate network template that will be applied to our offer;
- Redirect type – redirect type, in our case HTTP;
- URL – Link to our stream, previously created in Everad;
Click Create.
After adding the flow, save the changes to the campaign. The campaign is set up and ready to go, you can check it by using the campaign link, by clicking on which you can complete a test application:
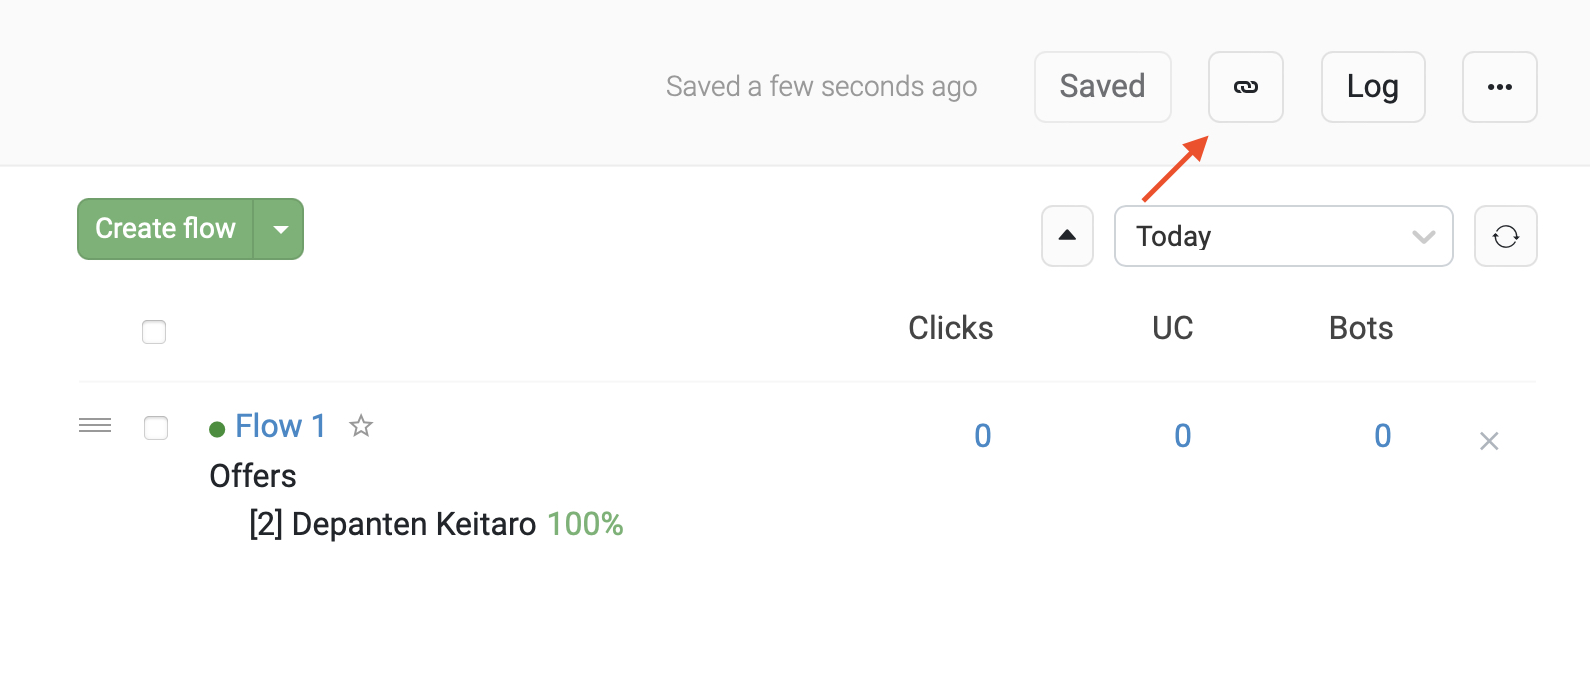
Information that a postback has been received from the partner network can be obtained in the section Maintenance – Logs – Received Postbacks
Local landing page with transit page
Step 1. On the flow page in your Everad account, you need to download the transit page and the main landing page.
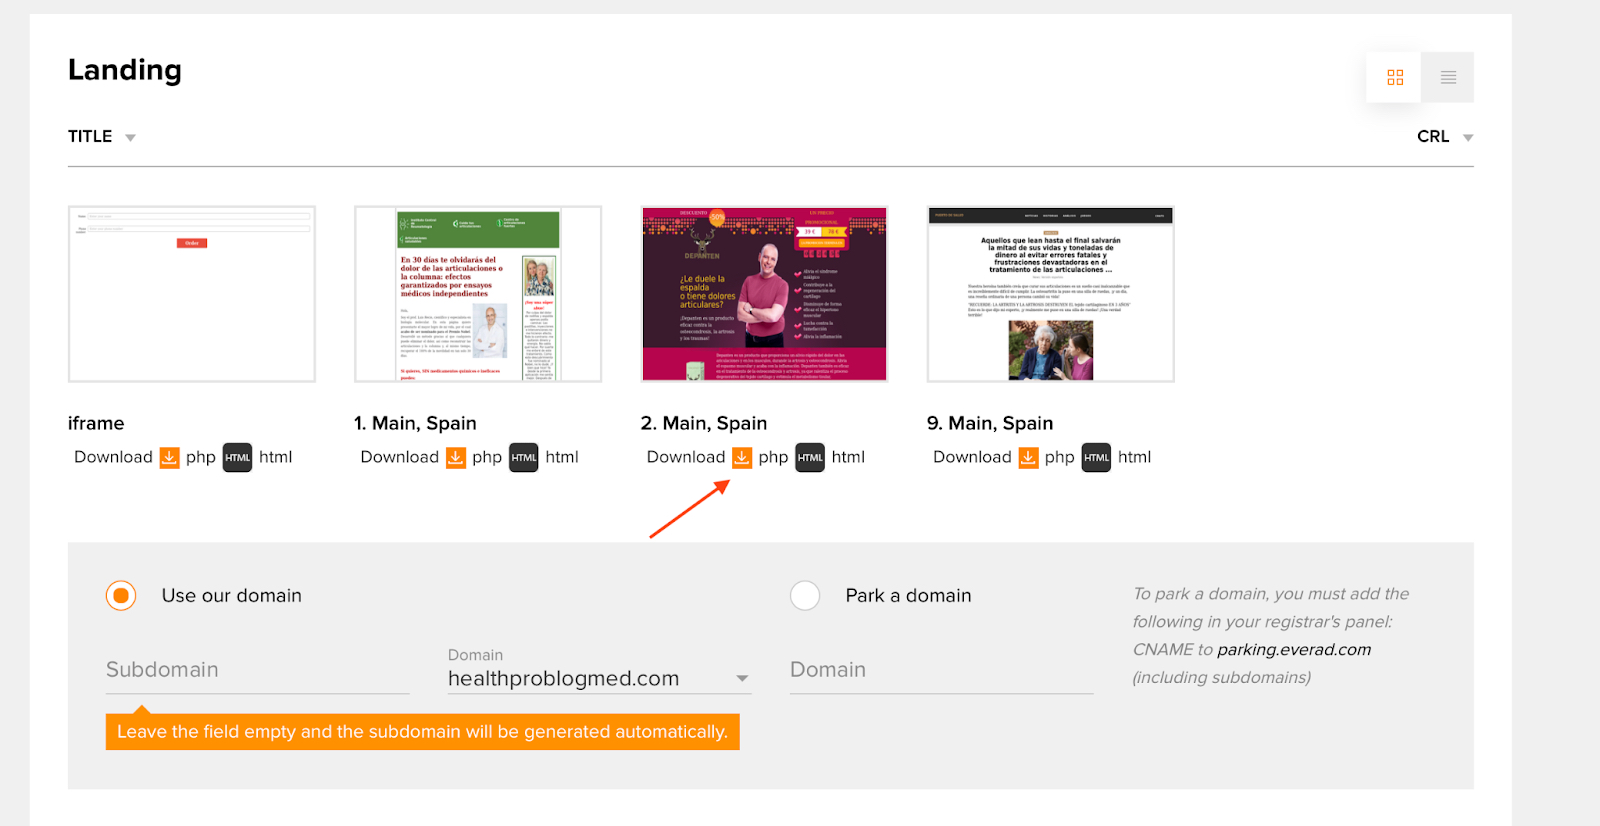
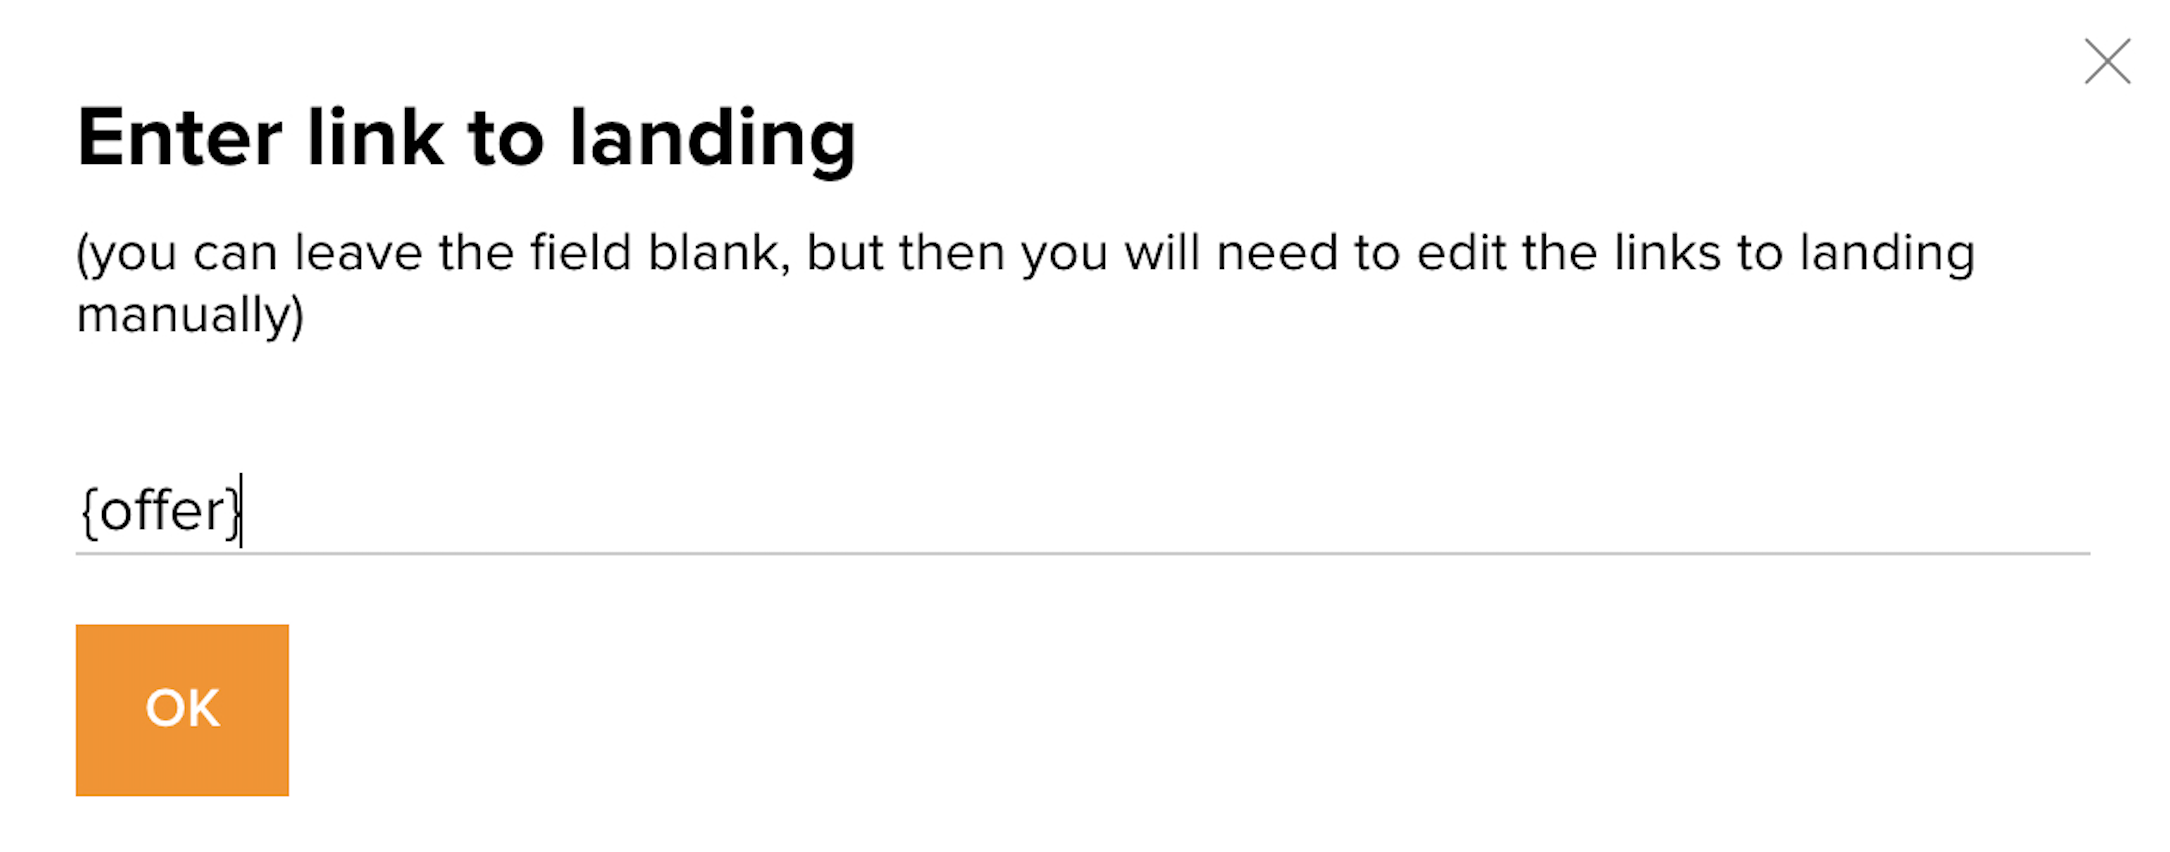
Before downloading the transit page, we will be asked to provide a link to our landing, in the field we write the {offer} macro.
In Keitaro, when working with a landing + transit page, the Landing + Offer scheme is used. The landing page is the transit page, and the offer is the main landing page.
Step 2. In the created campaign, click Create flow as in the previous diagram.
Step 3. Schema tab – Landing pages & offers – Landing pages – Create a landing page
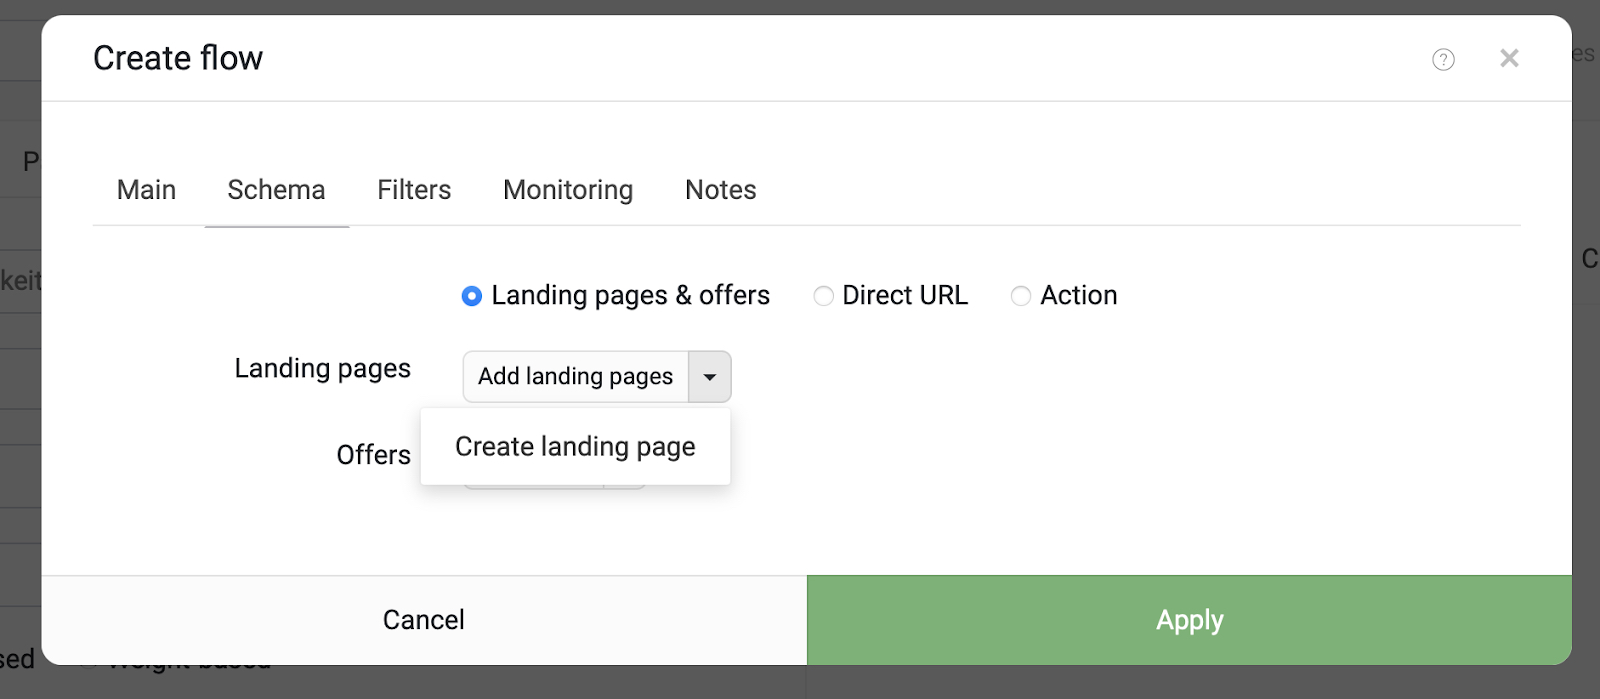
In the window that opens, fill in the following fields:
- Name – the name of our transit page;
- Group – the ability to create a group and sort by group in the future (optional);
- Local – download type;
- Zip-file – the choice of our archive with a transit page;
- Folder – change the name of the folder on the server (it is better to leave it by default)
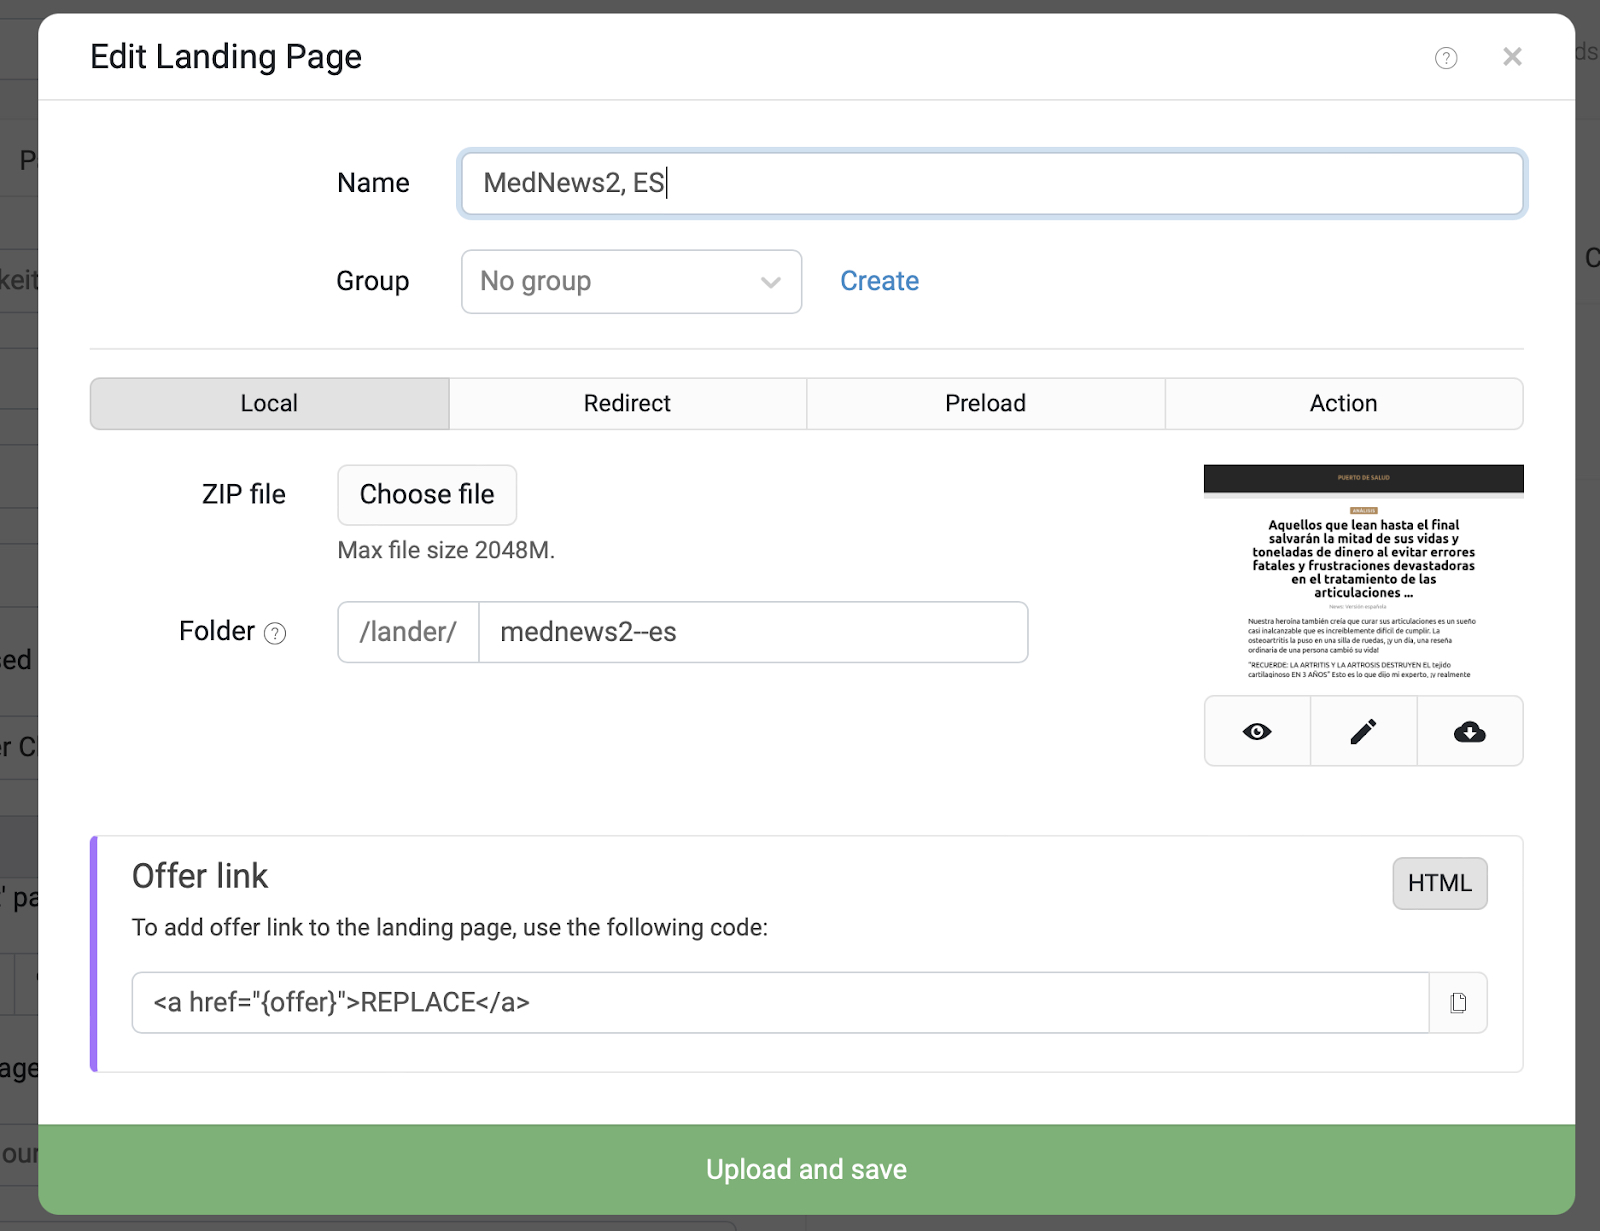
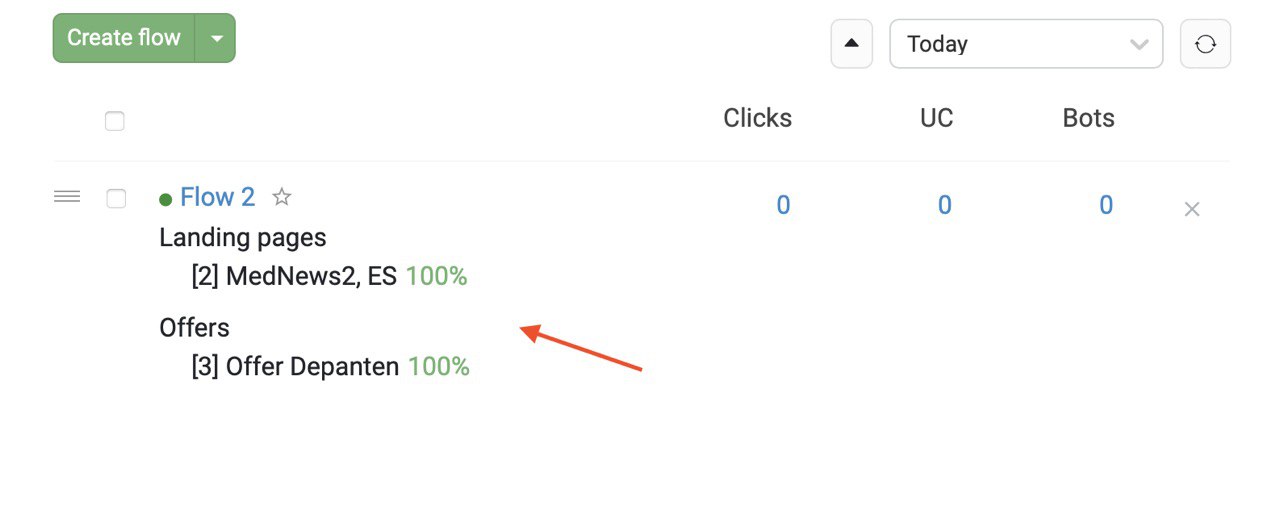
After loading and saving, we get a stream with an attached landing (transit page). Now it remains to create and upload an offer (the main landing page) in the same way and link it in the stream to the already created landing page.
Step 4. Open our stream with a landing page and click Create Offer:
By analogy with creating a landing page, select a local offer type and upload the previously downloaded archive from Everad with the main landing page.
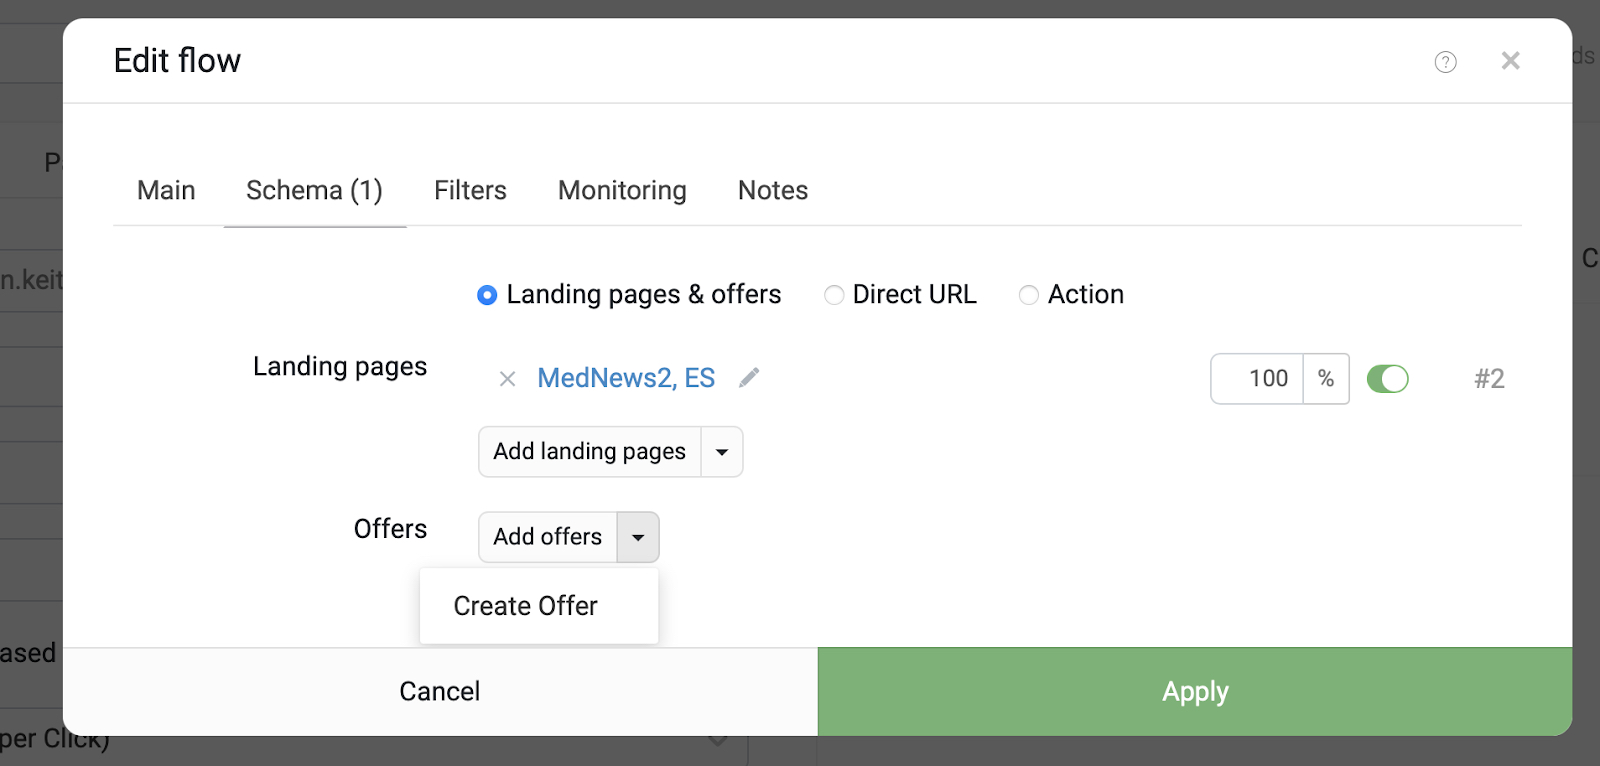
After loading and saving, we get a bunch of Landing and offer inside the stream:
Save changes to the campaign. Next, you need to follow the campaign link and check the postback.
Local landing without transit page
A local landing without a transit page is configured in the same way as with a transit page. You just need to download the main landing page and follow the previous instructions, and to add a promo to the tracker, start from Step 4.
If you have any questions – write to Keitaro and Everad support, we will be happy to answer and help.
READ ALSO:
Integration of Everad and BeMob cloud tracker
Everad and Binom integration: setup instructions
Successful setup and high ROI!
Reviews